
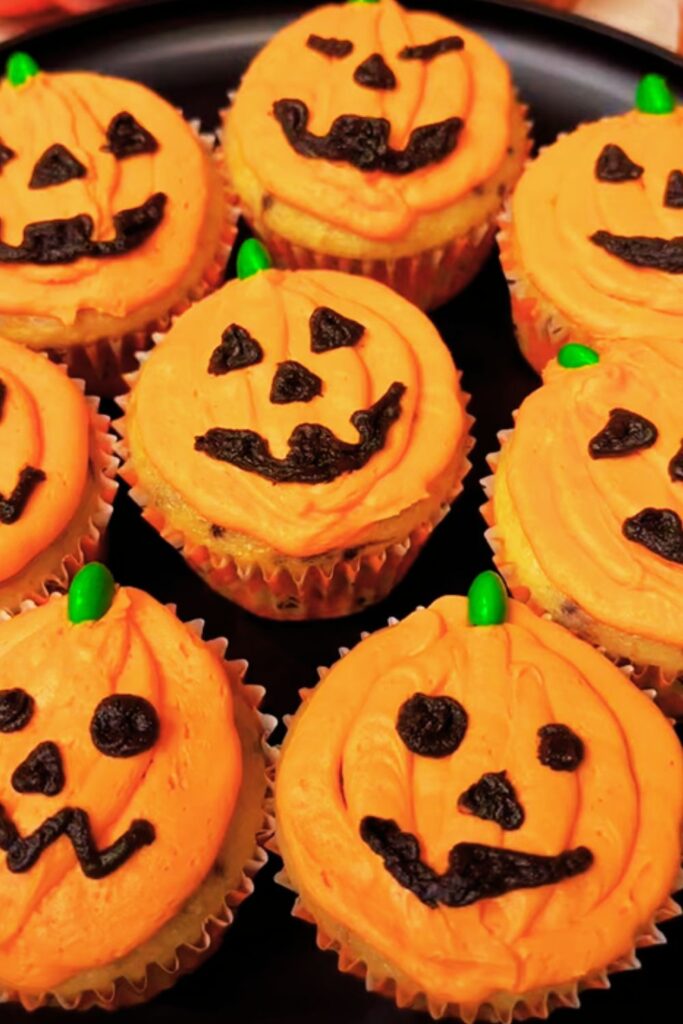
Halloween is my absolute favorite time of year. There’s something magical about the crisp autumn air, the colorful leaves, and the chance to indulge in spooky treats that are as fun to make as they are to eat. Today, I’m sharing one of my most requested Halloween recipes: Bloody Cupcakes that will make your guests scream with delight!
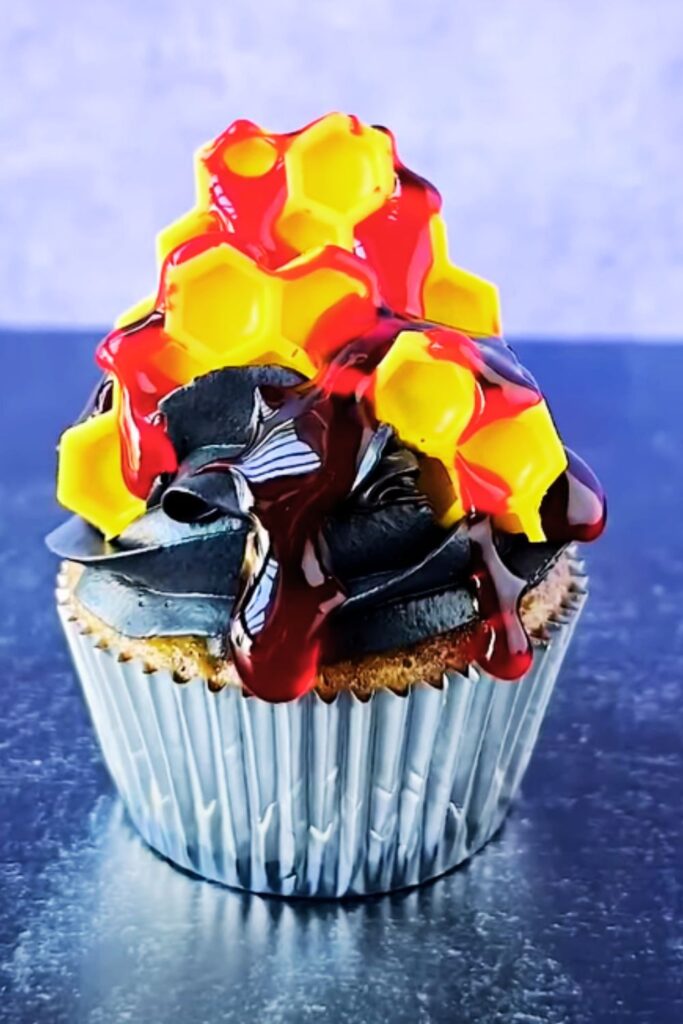
These gruesome-looking but deliciously sweet treats feature moist red velvet cupcakes topped with cream cheese frosting and a generous drizzle of homemade “blood” sauce. They’re perfect for Halloween parties, school events, or just a fun baking project with the kids. The best part? They look incredibly elaborate but are surprisingly simple to create.
What Makes These Cupcakes Special
I’ve been perfecting this recipe for years, and what sets these blood-drizzled cupcakes apart is the perfect balance of flavors and textures. The red velvet base provides that rich, slightly cocoa-infused taste, while the tangy cream cheese frosting cuts through the sweetness. The “bloody” topping isn’t just for show – it’s a delicious, slightly tart berry sauce that adds another dimension of flavor.
Let me guide you through creating these show-stopping Halloween treats that taste even better than they look!
Ingredients
For the Red Velvet Cupcakes:
- 2½ cups all-purpose flour
- 2 tablespoons unsweetened cocoa powder
- 1 teaspoon baking soda
- ½ teaspoon salt
- 1½ cups granulated sugar
- 1 cup unsalted butter, softened
- 2 large eggs, at room temperature
- 2 teaspoons pure vanilla extract
- 1 cup buttermilk, at room temperature
- 2 tablespoons red food coloring (or 1 tablespoon gel food coloring)
- 1 tablespoon white vinegar
For the Cream Cheese Frosting:
- 16 oz cream cheese, softened
- ½ cup unsalted butter, softened
- 4 cups powdered sugar, sifted
- 2 teaspoons pure vanilla extract
- Pinch of salt
For the “Blood” Sauce:
- 2 cups fresh or frozen mixed berries (strawberries, raspberries, blackberries)
- ½ cup granulated sugar
- 2 tablespoons cornstarch
- 2 tablespoons lemon juice
- ¼ cup water
- ½ teaspoon vanilla extract
- Optional: 2-3 drops of red food coloring for a deeper red color
Optional Decorations:
- Plastic toy knives, syringes, or vampire teeth
- Edible fake glass shards (made from sugar)
- White chocolate shards
- Black or Halloween-themed cupcake liners
Equipment Needed
| Equipment | Purpose | Notes |
|---|---|---|
| Muffin tin | For baking the cupcakes | Standard 12-cup tin works best |
| Cupcake liners | Holds cupcake batter | Black or themed liners enhance the spooky look |
| Stand mixer or hand mixer | For making batter and frosting | A stand mixer makes the process easier |
| Mixing bowls | For preparing ingredients | At least 3 different sizes recommended |
| Rubber spatula | For folding and scraping | Helps incorporate ingredients thoroughly |
| Piping bag with tips | For frosting application | A large round tip works well for the base |
| Small saucepan | For making blood sauce | Non-reactive pan preferred |
| Fine-mesh sieve | For straining blood sauce | Ensures smooth texture |
| Squeeze bottles | For blood application | Gives precision when applying the “blood” |
| Cooling rack | For cooling cupcakes | Prevents soggy bottoms |
| Food thermometer | For checking doneness | Cupcakes should reach 205°F internally |
| Kitchen scale | For precise measurements | Especially helpful for flour and sugar |

Step-by-Step Instructions
Preparing the Red Velvet Cupcakes
- Preheat and Prepare: Start by preheating your oven to 350°F (175°C). Line your muffin tins with cupcake liners – I prefer black ones for the Halloween theme.
- Mix Dry Ingredients: In a medium bowl, whisk together the flour, cocoa powder, baking soda, and salt. This ensures even distribution of the leavening agents and prevents clumping.
- Cream Butter and Sugar: In your stand mixer with the paddle attachment (or using a hand mixer), beat the butter and sugar on medium-high speed for 4-5 minutes until light and fluffy. This step is crucial for incorporating air into the batter, which helps create that perfect cupcake texture.
- Add Eggs and Vanilla: Add eggs one at a time, beating well after each addition. Scrape down the sides of the bowl as needed. Then mix in the vanilla extract.
- Combine Wet and Dry: Reduce the mixer speed to low. Add the dry ingredients in three parts, alternating with buttermilk, beginning and ending with the dry ingredients. Mix just until combined – overmixing will result in tough cupcakes.
- Add Color and Vinegar: Gently stir in the red food coloring until evenly distributed. Then fold in the vinegar – this will react with the baking soda to create a fluffier texture and enhance the red color.
- Fill Cupcake Liners: Using an ice cream scoop or 1/4 cup measure, fill each cupcake liner about 2/3 full. This gives them room to rise without overflowing.
- Bake to Perfection: Bake for 18-22 minutes, or until a toothpick inserted in the center comes out clean or with a few moist crumbs. The internal temperature should reach 205°F.
- Cool Completely: Allow cupcakes to cool in the pan for 5 minutes, then transfer to a wire rack to cool completely before frosting. This prevents the frosting from melting.
Making the Cream Cheese Frosting
- Beat Cream Cheese and Butter: In your mixer bowl, beat the softened cream cheese and butter on medium-high speed for 2-3 minutes until smooth and creamy.
- Add Remaining Ingredients: Gradually add the sifted powdered sugar, vanilla extract, and salt. Beat on low speed initially to prevent a sugar cloud, then increase to medium speed and beat for 2-3 minutes until light and fluffy.
- Adjust Consistency: If the frosting seems too soft, refrigerate for 15-20 minutes. If it’s too stiff, add a tablespoon of heavy cream or milk.
Creating the “Blood” Sauce
- Prepare Berries: In a medium saucepan, combine berries, sugar, cornstarch, lemon juice, and water. Mash the berries slightly to release their juices.
- Cook Mixture: Heat over medium heat, stirring constantly until the mixture comes to a boil. Reduce heat and simmer for 3-5 minutes until thickened. The sauce should coat the back of a spoon.
- Strain for Smoothness: Remove from heat and strain through a fine-mesh sieve to remove seeds and pulp. This creates that perfect, glossy blood consistency.
- Add Final Touches: Stir in vanilla extract and food coloring if using. Allow to cool completely – the sauce will thicken further as it cools.
- Transfer to Application Tool: Once cooled, transfer the blood sauce to a squeeze bottle for precise application. If you don’t have one, a spoon works too, though with less control.
Assembling the Bloody Cupcakes
- Frost the Cupcakes: Once cupcakes are completely cool, pipe a generous swirl of cream cheese frosting on top of each cupcake. I use a large round tip for a clean look, but you can use any piping tip you prefer.
- Create the Bloody Effect: Using your squeeze bottle, drizzle the blood sauce over the frosting in a random pattern. Let some drip down the sides for that truly gruesome effect. You can also create pools of “blood” on top.
- Add Final Decorations: Insert plastic knives, syringes, vampire teeth, or edible glass shards for an extra spooky touch. White chocolate shards can also create a broken bone effect.
- Chill to Set: Refrigerate the cupcakes for 15-20 minutes to set the frosting and blood sauce before serving.
Variations to Try
Dark Chocolate Bloody Cupcakes
Replace the red velvet base with a rich dark chocolate cupcake. The darker background makes the blood effect even more dramatic. Simply substitute the red velvet recipe with your favorite chocolate cupcake recipe and proceed with the same frosting and blood sauce.
“Infected Wound” Cupcakes
For an even more gruesome effect, cut a small hole in the center of each frosted cupcake and fill it with blood sauce before drizzling more on top. When bitten into, these cupcakes “bleed” from the center!
Brain Hemorrhage Version
Instead of a smooth frosting top, pipe the cream cheese frosting to resemble brain folds using a small round tip. Then add the blood sauce in the crevices for a truly disturbing “brain hemorrhage” effect.
Mini Bloody Cupcakes
Make bite-sized versions using a mini muffin tin. Reduce baking time to about 10-12 minutes. These are perfect for large parties where guests might want to sample multiple treats.
Nutritional Information
| Nutrient | Amount per Cupcake | % Daily Value* |
|---|---|---|
| Calories | 385 | – |
| Total Fat | 21g | 27% |
| Saturated Fat | 13g | 65% |
| Cholesterol | 75mg | 25% |
| Sodium | 245mg | 11% |
| Total Carbohydrates | 47g | 17% |
| Dietary Fiber | 0.5g | 2% |
| Sugars | 38g | – |
| Protein | 4g | 8% |
| Vitamin A | 635 IU | 13% |
| Calcium | 45mg | 3.5% |
| Iron | 0.8mg | 4.5% |
*Percent Daily Values are based on a 2,000 calorie diet. Your daily values may be higher or lower depending on your calorie needs.
Storage and Make-Ahead Tips
These bloody cupcakes can be prepared in stages to make the process more manageable, especially if you’re planning for a big Halloween event:
Cupcakes:
- Bake up to 2 days ahead and store in an airtight container at room temperature.
- Freeze unfrosted cupcakes for up to 1 month. Thaw completely before frosting.
Frosting:
- Make up to 3 days ahead and store in the refrigerator.
- Bring to room temperature and re-whip briefly before using.
Blood Sauce:
- Prepare up to 5 days ahead and store in the refrigerator.
- Warm slightly if it becomes too thick, then cool again before using.
Fully Assembled Cupcakes:
- Best enjoyed within 24 hours of assembly.
- Can be refrigerated for up to 3 days, though the blood sauce may begin to bleed into the frosting more over time (which can actually enhance the spooky effect!).
- Do not freeze assembled cupcakes as the texture will deteriorate.
Serving Suggestions
Halloween parties call for themed food and drink pairings! Here are some suggestions to complement your bloody cupcakes:
Beverages:
- Smoking punch made with dry ice (with proper safety precautions!)
- Black cherry or pomegranate sparkling water
- Hot apple cider with cinnamon sticks
- “Toxic waste” green lemonade
Savory Counterparts:
- “Mummy” wrapped hot dogs
- Spider web pizza (regular pizza with a web design made from sour cream)
- Deviled “eyeball” eggs
- Ghostly cheese and cracker platter
Tips for Perfect Bloody Cupcakes
- Room Temperature Ingredients: Ensure butter, eggs, and buttermilk are at room temperature before beginning. This creates a smoother batter and more even rise.
- Don’t Overmix: Mix the batter just until ingredients are combined. Overmixing develops gluten and leads to tough cupcakes.
- Consistent Sizing: Use an ice cream scoop or measuring cup to ensure all cupcakes are the same size. This ensures even baking.
- Cooling is Crucial: Never frost warm cupcakes! The heat will melt your frosting and ruin your design.
- Blood Sauce Consistency: The blood sauce should be thick enough to hold its shape slightly but thin enough to drizzle. If it’s too thick, add a teaspoon of water; if too thin, simmer it a bit longer.
- Control the Blood: Use different tools for different effects – a squeeze bottle creates precise drips, while a spoon can create larger, more random splatters.
- Temperature Management: If your kitchen is warm, refrigerate the frosted cupcakes for 15 minutes before applying the blood sauce to prevent the frosting from becoming too soft.
- Color Enhancement: For a truly red (not pink) blood sauce, use gel food coloring rather than liquid food coloring. Black gel food coloring (just a tiny amount) can deepen the red to a more realistic blood color.
- Photography Tip: If you’re taking photos of your creations, place the cupcakes on a white plate or cake stand to make the blood effect really pop.
Why These Cupcakes Are Perfect for Halloween
What I love most about these bloody cupcakes is how versatile they are. They’re gory enough to impress the adults at a Halloween party but can be toned down for younger audiences by describing the topping as “cherry sauce” instead of blood.
They also serve as a wonderful conversation starter. I’ve found that when I bring these to parties, everyone wants to know how they were made, which leads to sharing baking tips and Halloween stories – exactly what bringing food to gatherings is all about!
The contrast between the gruesome appearance and the delicious taste creates that perfect Halloween juxtaposition of horror and delight. And let’s be honest – there’s something thrillingly transgressive about eating something that looks like it belongs in a horror movie!
Q&A Section
Q: Can I make these cupcakes without food coloring? Yes! For the cupcakes, you can use natural alternatives like beet powder (2-3 tablespoons) or reduced beet juice (about 1/4 cup in place of some of the buttermilk). For the blood sauce, simply omit the food coloring – berry juice is naturally red, though it may be more purple-toned than bright red.
Q: How do I prevent my cream cheese frosting from being too runny? The key is temperature control. Make sure your cream cheese and butter are softened but not warm or melting. If your frosting seems too soft after mixing, refrigerate it for 20-30 minutes before piping. Also, be sure to use full-fat cream cheese in block form, not the spreadable kind from a tub.
Q: Can I make these cupcakes gluten-free? Absolutely! Simply substitute a cup-for-cup gluten-free flour blend in place of the all-purpose flour. I recommend adding 1/4 teaspoon of xanthan gum if your blend doesn’t already include it, which helps with texture.
Q: How far in advance can I prepare these for a party? For the best presentation, I recommend assembling them no more than 24 hours in advance. However, you can prepare all components separately ahead of time (cupcakes, frosting, blood sauce) and assemble the day of your event.
Q: The blood sauce is too thin. How can I fix it? If your blood sauce is too runny, return it to a saucepan and add a slurry of 1 teaspoon cornstarch mixed with 1 tablespoon cold water. Bring to a simmer while stirring constantly until thickened. Cool completely before using.
Q: Can I use a different frosting if someone doesn’t like cream cheese? Certainly! A vanilla buttercream works beautifully as an alternative. The stark white color creates an excellent contrast with the blood sauce. For authenticity, avoid chocolate frosting as the dark color makes the blood effect less visible.
Q: How do I transport these cupcakes to a party without ruining the design? Invest in a cupcake carrier with deep wells, or place toothpicks around the edges of each cupcake before covering with plastic wrap (keeping the wrap from touching the frosting). Transport in a box lined with non-slip shelf liner to prevent shifting. If possible, you can also bring the frosted cupcakes and blood sauce separately and add the final blood effect at the party.
Q: My red velvet cupcakes turned brown after baking. What went wrong? This happens when there’s too much cocoa powder or when the red food coloring isn’t sufficient. Make sure you’re using the exact measurements in the recipe, and consider using gel food coloring which is more concentrated than liquid. Also, check that your cocoa powder is natural, not Dutch-processed, as the latter can affect the color.
Final Thoughts
Halloween baking is about embracing the playful, spooky side of the kitchen. These Bloody Cupcakes allow you to create something that’s visually dramatic while being deliciously satisfying. They’re the perfect way to show off your baking creativity and delight guests of all ages.
Remember that the best Halloween treats balance shock value with genuine tastiness – and these cupcakes deliver on both counts. The rich red velvet, tangy cream cheese frosting, and sweet-tart blood sauce create a flavor combination that’s irresistible, no matter how gruesome they might look!
So this Halloween, when you’re looking to make an impression, skip the store-bought treats and try these homemade Bloody Cupcakes instead. I promise they’ll be the hit of any Halloween gathering – just be prepared to share the recipe!
Happy Halloween baking!
